
Combining an old tool with modern day techniques! Another application where centerpins shine.

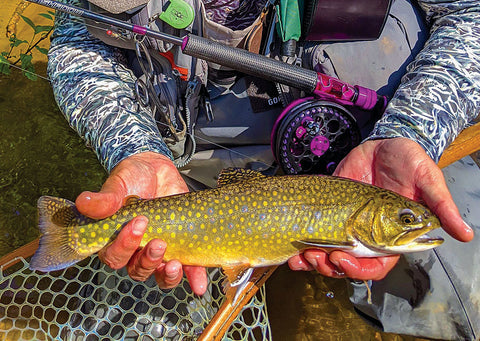
Danny Colville showing off an Erie tributary steelhead.
Crap! I wake up to my phone ringing only to realize that I set the time but didn’t engage the alarm. I jump out of bed, brush my teeth, grab my gear, scoop a cup of coffee and go! Darn I forgot one of my 10 fly boxes…grrr. At this point people are going to work and kids are getting scooped by those big, slow and annoying buses...deep breaths. I can picture a guy standing in my run, reeling in my fish. I’ve been working so hard I am exhausted, but fishing will regenerate my soul more than sleep will! I drive my WRX as fast as I can, but cautiously. I finally pull down the dirt road to find...what…no cars. Ahhhh...breathe Danny breathe. I suit up quickly, double check my pockets and walk down to the creek. The sweet smell of the forest floor combined with the smell of the river started the first part of my soul cleansing journey. My feet hit the water and it felt like someone dumped a bucket of water on me while I was on fire. I walked with a steady pace while observing rocks below my feet and the cloudy sky. I approached the spot—a bend in the river with a large boulder separating the water into two prominent runs. I unhooked my jig from the hook keeper, ran my finger up my leader, made my float adjustment and began fishing. I started in the least fishiest areas. After each drift I made a slight adjustment to my float. No takers. I reeled in, double checked the points of my hooks, slid my float up 6 more inches along with the shot just below my float. I laid the cast upriver in front of the boulder. I reeled in my slack line as it approached me. I pulled my float toward the inside seam of the boulder. I could feel the speed the river was traveling from the reel rolling against my palm. I wanted to be slower. I lightly touched the reel slowing my float from a running speed to a walking speed. Any second…bloop. That unmistakable sound of my float dipping below the surface and my subconscious setting the hook. I lift up to feel heavy head shakes. After the one on one fight I had this beautiful 19-inch wild brown on the bank. I studied him ever so briefly and burned an unforgettable image into my mind and set him free. Any stress I had from the morning, even from the work week prior left my body.

One of my proudest moments was when I received a phone call from a “fly fishing” guide in Tennessee. He said “Danny, I can’t thank you enough for getting me into centerpinning. I have been fly fishing for 40 years and I haven’t had this much fun since I was just starting out fly fishing at 16 years old!” When I asked if he was catching way more fish, his response was “yes, but the feeling of the river in your hand, being in total control and fighting the fish with no drag is epic!” I truly was humbled. I was able to give someone who had been fishing longer than I have been alive, a whole new life changing experience doing what he loves most.

Combining proven effective techniques with a reel that allows you to free spool, stall the bait at any depth you want and match the speed of the subsurface current is the recipe for more successful trips on the water. There are very few styles of fishing that will compete with the centerpin! The versatility is really second to none!
Traditionally centerpins have always been used for anadromous fish like steelhead and salmon. They are even used for carp, catfish, and a whole variety of coarse fish in England. They are most popular in North America in Great Lakes’ tributaries and British Columbia. The technique really shines because you can manipulate your natural drift by slowing the reel from spinning to bring the bait up in the strike zones. Utilizing the long rod, floating mono and free spooling reels gives you the ultimate advantage for pressured fish. Trust me, centerpins work just fine for non-pressured fish too, but they give you that one extra advantage—presenting the bait perfectly at a distance.
There are a handful of techniques currently used in the fly fishing community that combined with a centerpin are deadly. The three I want to focus on are Indicator Nymphing, Euro Nymphing/Tight Line Nymphing, and swinging flies. Each method is very effective with a fly rod and reel but there are reasons why switching to a centerpin is going to yield better results. Let me explain the problems with each method.
A beautiful giant wild brook trout caught in a cold water tailrace in the summer months. This fish came on the next drift after a fly change. Those halos are absolutely gorgeous!
Traditional Indicator Nymphing is typically using a fly rod with either one fly or a series of dropper flies to give you the best chance at catching a fish. Indicator Nymphing does put your fly in the zone. Often times right in front of the fish’s face. Unfortunately, the amount of time that the fish sees your presentation is over in just a few second. When using this technique, the amount of drag you get on both you fly line, and on your indicator, only gives you a couple of feet of natural presentation. The amount of mending that you must do to make sure you don’t get a downstream bow in your line is overkill. You can’t get much distance and you need to fish relatively close to yourself. This isn’t good for spooky smart fish that have seen this before.
Euro Nymphing/Czech Nymphing/Tight Line Nymphing is a much more formidable approach for fishing buggy baits. This style has a cult following in the USA. It is extremely fun and effective. Utilizing long rods, barbless hooks with monofilament or fluoro running line you are basically bottom bouncing or drop shotting a very light rig. Like its description, it’s called Tight Line Nymphing because you cast upstream, slowly work your line back, tapping bottom ever so slightly. While your presentation is working downstream you gently use your fingers or hands to keep tight. You then let your flies drift just off bottom below you. Repeat. Reposition. Repeat. This is absolutely a much more fun way to fish vs. nymphing with a thick fly line and indicator. You feel the fish take and you’re connected to the bottom most of the time. It’s a fast pace style of fishing that has been used for many decades in world fishing competitions. Your flies travel at a natural speed and they are in the strike zone longer. An added feature of Euro Nymphing is your flies quickly get in the zone. There are many subcategories of Tight Line Nymphing from each country that has put their own little twist on it. But there are a few key problems with Tight Line Nymphing.
My biggest issue with this technique is you are literally almost on top of the fish. So much so that the Spanish World Fly Fishing Team would dress in all camo and paint their faces to match. This certainly isn’t the best thing for spooky fish that can feel you walk the banks of the river as you approach. The other issue is the lack of ability to fish wherever you want. If you want to fish a seam on the other side of the river with a tight line technique, you most of the time would have to cross the river. I have seen some good Tight Line Nymphers work a river pretty effectively. Most of the time they leave a lot of fish behind because their presentation is always the same speed. One final note. Nymphing is so effective because bugs are a high percentage of a trout’s diet.

Some of the best patterns are the classics with a twist. Guide Fly Company, Greg Piotrowski's creative ties on 3.5 mm and 4mm Tungsten Slotted Beads with Daiichi 4640 Jig Hooks. These are deadly for trout and steelhead as anchors on the dropper rigs.
By far one of the most enjoyable ways to catch a fish is on the swing. That is a common theme among lots of anglers. The reason? You have the most direct contact to the strike of any technique. It’s a “rip the rod out of your hands” kind of bite that very few other fishing styles can offer. Swinging flies can be effective. You need to have good temps, not to hot or cold. When the stars align, and you have the right conditions, right streamer, and hungry fish you’re in for a memorable day. The only bite that can come close to a streamer bite is a spoon bite in current. It’s like you and the fish have a magical connection. So yes, that is great and all but if you were to talk to the majority of “swing only” fishermen you would get to hear about all the time they spent on the river day in and day out to have the one rewarding day. I am all about working hard for the fish, but with my limited time I get to have on the water I want the best chance possible.
I like a challenge when fishing, but the main reason I go is to land a fish. I’m not stubborn enough to only fish one way. Yes, I want a challenge, but I want to admire these beautiful creatures we are so lucky to have, up close and personal. I have found the best way to catch finicky trout, while having a connection to the river that is unique to this technique, is by utilizing a mini centerpin.

Centerpins, traditionally used for salmon and steelhead, are 4.75”-5.95”. What dictates the reel size is the rod size, river size, and type of fish you will be targeting. The bigger reels have more weight to balance when matched with heavier rods, pick up more line on those long drifts, hold larger lines, and gives you better torque when fighting a fish. The smaller you go the lighter the reel gets which means the lighter the rod you need. Centerpin rods and reels are all about balance. So for trout fishing I need something that will balance a super light 9-12’ rod that is rated from 1- to 6-pound test. This is most likely going to fall closer to the 4” size. My preferred Reel is a Colville Precision Reel Pinland model at 3.95”. You can imagine how fun this set up is when you’re running a super light-weight, moderate-action rod with good recovery. There are not of ton of options for rods, but I will go over gear later in the article.
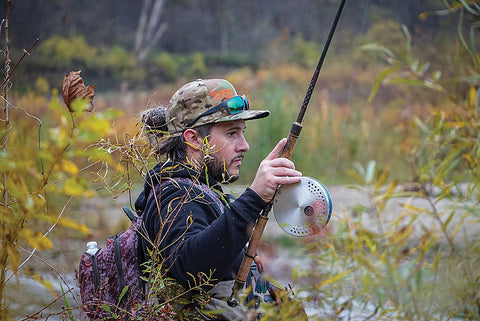
Keep your eyes on the prize. The bobber can drop at any time.
All of the current centerpins on the market are a 1-1 Ratio. They are a very primitive reel. They have a clicker for travel or rigging. Besides that, everything the reel does is controlled by you or the river. This is one of the many reasons why this is such an attractive method. It’s just you, the river and if all goes right the fish! This is one of the few techniques that you feel the flow of the river right on your hand. It’s a pretty special feeling to find the sweet speed of your float and you know that bobber is going to drop at any second. More times than not it does. There are very few things as fun and rewarding as using a single-action reel with no drag.
Most centerpin fishing utilizes a multitude of float shapes and sizes to achieve the presentation desired. People often think a centerpin is so effective because they can drift naturally on the surface current. Sure, this is true, but the fish are not sitting at the surface current. They are sitting near the bottom. Centerpins make it effortless for your presentation to achieve the speed of the subsurface current by applying pressure to the reel. This is called trotting your float. Most experienced centerpin fisherman will always have their float angled upstream towards them which is slowing the bait down to the subsurface current speed while having your bait lead the way in front of everything else on your line. The fish sees only your bait moving at the perfect speed. While having this control you can drop the bait or rise it up over rocks. You’re in total control the entire time and when the float drops you are the drag. Even casting is an artform of balance, energy distribution, and timing.

Having the ability to fish upstream, downstream and across from you effectively with a few minor adjustments makes this style of fishing by far the most effective. Even better, you can position yourself anywhere that the river bank will allow and drift down to your target. If you can’t get the best angle to achieve this, you can cast to your target. The best centerpin fishermen will use the drag of their mainline to position their float where they want, throw a quick mend and start the drift. I often cast slightly downstream at an angle, let the current pull my floating mainline to my desired area. I put pressure on my reel, lift my rod and connect to my bobber. Now I can swing my presentation, dead drift it or trot it. If you’re fishing a larger river you have the option to fish from a boat! You can cover water quickly or you can use a stealthy slow approach when floating a river. You can also have multiple anglers fishing at the same time with little issue. You can fish any traditional conventional techniques like bobber dogging, but my favorite way is to anchor at the top of a run and let my float go. You can virtually drift as far as you want if you can still see your float. There are very few limitations when using a centerpin!
Over the past few years I have been playing with taking some of these various popular fly techniques and combining them with the benefits of the centerpin. By making a few changes to your split shot pattern below your float, you can get your bait to sink at the rate you desire. Having a mental image of what your bait is doing in the water will allow you to achieve the one that will work best for the situation. 99% of the time I am running a version of the accelerated shot pattern which consists of larger shot or bulked shot under the float which gradually gets smaller and smaller the closer it gets to your bait. If fishing up-stream of myself I either prefer a bulk shot method or a drop shot method. Because you can’t “trot” your float from downstream, putting your bait on droppers with a small amount of shot at the very bottom of your leader will give you the most natural presentation. Many fly fishermen on some of the famous western rivers use this style on their fly rods for trout. Sometimes with an indicator and sometimes with out. Again, I would always prefer to approach the fish from a distance rather than being near them.
One of the most effective and fun techniques utilizes a similar rig to Tight-line Nymphing or Indicator Nymphing. I call this “Long Distance Nymphing.” Essentially you run an anchor fly (jig) that will anchor your presentation and a small fly above that known as the dropper. Make sure you check the regulations before running the additional hook point. The dropper gives you an alternative depth and allows you to fish patterns that mimic a nymph “emerging” up to the surface. Many of my fish come on the dropper so I always like to run it if I am allowed. By adjusting your trotting speed, you can have your dropper lead the way or even give your anchor a bit of a swing. The dropper usually consists of a lighter nymph than your anchor fly. I often fish pretty simple patterns like Hares Ear Nymphs, PheasantTails, Scuds, or variations of these flies I’ll concoct at my vise while burning the mid-night oil. For trout fishing I often choose sizes 12-18 for my dropper. My anchor fly consists of a 60 or 90 degree lead or tungsten head jig that ranges from sizes 8 to 16. Unlike Euro Nymphing I am just as likely to run a marabou jig as I am a Perdigon. It all depends on what I am trying to accomplish.

Another key difference is the hook type. I prefer barbed jig hooks. There are loads of different choices of barbless jig hooks. Besides the Gamakatsu J20 and the Limerick Bend style from Daiichi, there are very few options readily available for float fishing. I’m fishing for fun, not for competition so why wouldn’t I choose to have a better chance at landing a fish of a lifetime if I were to hook one? If you are not allowed to fish a barbed jig hook then I would suggest finding a hook that has as long of a point as possible past the bend of the hook, and has a slight downward angle to inward towards the gap. I have yet to find a barbless hook that I love. I will share one little tip with you if you have found a hook you love. Take a small but of thick UV cure resin and make a little bump or barb of your own. UV resin has so many awesome benefits! Many tight line nymph enthusiasts will argue that it’s easier to keep a fish pinned with a barbless hook. That might be true but remember they are always tight to their presentation and are close to their target. Many times they have the fish into their net with two quick strips. With a float you need to use the surface current to help take you to your target. Very specific floating line helps to achieve this. The rods are softer as well so you can imagine having any sort of slack in your line would cause a fish to shake the hook easily. Besides better float control, the longer rods act as a bumper to ensure that light leaders will be protected during the fight. These soft rods really work the fish with little fatigue on the angler. It helps you land the fish pretty quickly if you know how to use your rod which causes much less stress on the fish. Remember the water can be much warmer in the summer and fall months so you must handle fish as little as possible.

Centerpin reels are an extension of the fisherman. Colville Precision Reels offers a wide variety of sizes, colors, etchings, and porting patterns. Here is a batch of 3.95 Mini Pin reels getting ready to go out all over North America.
Just because you want to try a center-pin reel doesn’t mean you have to leave the fly rod or spinning reel at home. Remem-ber, it’s just another tool to help you build a successful day. If you want to have all your bases covered bring a rod for throwing dry flies towards dusk. I have experiment-ed with fishing a dry fly with a float by mounting a larger barrel swivel on the top stem of my float and using weight below my float just to keep it upright. Like I said you can do anything with a centerpin, but you lose the ability to “skate” the dry fly and give it movement without having your float disrupt the surface. It will work in a pinch. Sometimes trout need lots of erratic movement from your bait to trigger a bite. I have played with articulated jigs, marabou jigs, you name it, I have tried it. They all will work. If you want to have all your bases covered, I would include a spinning rod in your arsenal with a small jerk bait style minnow imitation. My favorite are Yo-Zuri Pins Minnow or a Rapala countdown. It’s a great way to cover water that lacks specific features for drifting.
The Rig
The standard centerpin rig consists of 3 pieces of float tubing. One for the top of the float, a backup for the top that sits below the bulb of the float and one longer bumper piece that extends just past the bottom stem. Your float weight will deter-mine how much split shot you are putting below it. For example, an 8-gram float will get 8 grams of weight. When you put your weight on, start from heaviest to smallest and add them up as you go. You can always move your shot around to get your desired sink rate so don’t beat yourself up trying to guess how many sizes of each. The main thing to remember is you should always have the shot moving from your float to your bait getting lighter. At the bottom of your shot you want to add your size 10-28 micro swivel. I typically run an arm’s length worth of leader and I will add a few #4 or #6 shot to it. That really helps get your bait down quick if you want to with little adjustment to your shot on your mainline. Sometimes, so I don’t have to keep apply-ing the really tiny stuff to my leader I will cut my leader size in half, go up 2 pounds in strength and tie on another swivel below that and then put the lightest leader attached to my bait. It helps save on fluoro because you only have to use half the size each time you put a fresh piece on. If I am running two flies on a triple surgeon knot dropper I will skip the second swivel and use heavier leader on the upper half. I like to use the tag end of the knot that is facing up toward my float, so my fly stays horizontal as I am drifting.
There are some great YouTube videos on rigging if you search for “centerpin rigs Danny Colville.”
For long distance nymphing I like to use a small light fly for my dropper. Even an emerger has it’s time and place. At the bottom I like to run a 60- or 90-degree jig. I tend to focus on basic traditional ties with some minor variations like Hares Ear, Pheasant Tails, Frenchies, Micro Leeches, minnow patterns and Caddis. Usually one of those will be popping. You can buy these flies from most places but the jigs are a specialty. I really strongly suggest get-ting a vice and buying $100 in materials. There are so many step by step videos for every tie out there on YouTube. Once you see what works, modify them to your area and hang on. There is little more rewarding than catching a fish on a fly you tied... especially with a drag free reel!
The Rods: Length and Casting Style

There are not many options for "Pinland" style float rods on the market today but Blood Run and Taar have some really nice affordable rods that fit the bill. I prefer 4 piece because they break down as a 2 piece rigged. Very rarely do I break down a 4 piece all the way unless I am traveling. With today's technology 4-piece rods perform as well as 2 piece.
Centerpin rods are different than noodle or a standard bobber rods. Like with any centerpin rod, you want something that is light and responsive. Don’t confuse fast action with good recovery. You are looking for a moderate rod that has good recovery. Think of a soft rod that will quickly snap back to its original straight form. This way you can get a rod that is soft and will protect your leaders, while allowing a clean hookset when you are making those long drifts. We utilize the belly of the line so much in this technique that it’s essential to have a moderately fast rod with good recovery. The market lacks rods for this specific technique because it’s so new! My favorite rod is an older 10’, 3-weight rod. I would give it a rating of 1- to 4-pound-test line and probably a 1/16-ounce float (1.5-4 gram float). Many of the Euro Nymphing blanks that are 10-12’ are perfect. Blood Run Tackle released a beautiful 10’6” 3-6# rod called the “The Pinland” for only $110 that everyone should have in their arsenal. For that price it’s a good “baseline” rod. I often tell people that are new to this style to invest more in a reel and less in a rod so you can see what you like. With reels you know what you want, but rods have so many variables that some like and others don’t. After you try a rod you’ll know where to go with your next build. Another blank worth mentioning is the Syndicate 11’, 3 weight. That’s another banger of a rod for the cost. It’s only available as a built Euro Nymphing rod currently. How you cast will come into the equation when picking out the perfect rod. There are various ways to cast a centerpin, but when using such a light rig your choices are either side casting or one of the variations of Wallace casting. For those who don’t know the difference, side casting utilizes more of the load of the rod and energy of the angler. The line comes off the side of the reel in coils by holding you hand off to the side like a guide. Then you have to come to either side of your body and sling the rig out there like you are casting a spinning rod. If you like changing your line regularly this is a great technique for you. It’s a bad technique if you want to cast in tight quarters. Overall, I strongly suggest learning to spin the reel when you cast. If you can’t seem to get the timing and you do have to utilize the side cast, the shorter the rod the better in tighter areas.

One of the coolest casting techniques I have learned is modifications of the Wallace cast. The Wallace cast is so cool because it’s the only cast I know that you can gain distance by how hard you pull down on the line coming off the spool and by how much momentum you have with the “pendulum” below the tip of your rod. It’s simple physics and it’s hard to imagine without actually seeing it firsthand. The more line you have from the tip of your rod to your float, the more momentum you gain when you simply drop the rod down and bring it up. This is where rod length is important. The longer the rod the more line you can let out. So, if I am fishing in rivers with heavy bank cover, I want a longer rod. I gain my power by moving my rod from 20 degrees, to 0 degrees which causes the line to swing towards your body. As the line starts to travel forward you simply time it correctly and pull down with pressure. The harder you pull the more line comes off the reel and the further your cast is. There are very few times I haven’t been able to reach my target. If you’re in a situation where you can bring the rod to either side of your body you can add some rod load, giving you even more distance. I have some great YouTube videos out there showing this step by step. If you get the hang of this cast the longer rods 11’6-13’ are very beneficial. Of course you can do this with shorter rods also, but it is much more challenging. The moral of the story is sometimes the tighter the stream or river is the longer the rod you want. I will say once you reach that 13’6” mark you start loosing the benefits of the length and the rods become bulky and uncomfortable.
The Reel

Colville Reels are made in Buffalo, New York by a team of anglers who share the same passion as its customers. The artwork on the backplates is created by artists from all over the world who love salmon, trout and steelhead fishing!
You can use any centerpin reel for this technique but if you want to have minimal fatigue and the most fun, buy a reel that fits the water and rod you are fishing. Since we are fishing for smaller trout in smaller flows most of the time (50-400) CFS I prefer a Colville Precision Reel Pin-land model. They are specifically made to balance the light, long rods and have end-less customizable features. These reels are 3.95” and have a 1” width. They also are fun little steelhead reels if you want to give yourself a challenge on smaller rivers. The main reason you go up in size of your reel is for the pick-up, line capacity, and weight. A standard 4.5-4.85” will also work well if you want to just use your smaller steelhead reels. Colville Precision Reels are made in Buffalo, New York by three fishermen who share the passion for fishing. Colville Precision Reels can be ordered anyway you want, but the best and most unique features are the ceramic bearings and the textured rim. The ceramic bearings help send a message to your brain on how fast the reel is spinning during a cast or on a drift. It really gives you a sound and feeling no other centerpins will give you. The textured rim is awesome for Palm Retrieving and fighting fish. That slight texture allows you to put the perfect pressure on the reel during the battle. If your reel gets wet, it also helps in retrieval. Because fishermen are making this reel, the team at Colville Precision Reels cover all the bases from handle shape/size, tolerances to manage water/cold weather and they have a lifetime warranty. No sending your reel to Canada or England for updates and repairs. Why buy anything else?
The Line
Because this is so new there are not a ton of float fishing specific lines available. However, a few companies have developed some good ones. When looking for a float fishing line you want something that floats well, mends easily, flows through guides effortlessly, has good knot strength and low stretch. Some people love the high visibility lines, but I have seen fish turn away from a rig in clean water rigged with hi-vis line. There are all kinds of ways you can still use it by running a fluoro bumper etc. But why even worry about it? I use the belly and slack of my line more than anyone else I have seen float fishing and I prefer low visibility line in olive, gray, clear, purple, or faint blue. The only argument I have heard for using high visibility line is that other anglers can see where you are drifting. I don’t like fishing in crowded areas so that doesn’t apply to me.
Chromium (Supernix)—New for 2020! This is now by far my favorite line. Originally used in the textile industry, this line then ventured into the dry fly market as a leader. With a little direction this German material is extruded in Korea by some of the finest manufacturers of line, leader and rod building thread. This stuff floats better than anything else on the market. You can pinch split shot on it and slide them with little effort. It flows through any guides—even dirty recoils or older aluminum oxide guides. It’s really thin, super strong, and the knot strength is outstanding. Its finest characteristic is its low stretch. Chromium has 21% stretch which is about 10% less than mono float fishing line. That means it has some stretch where needed to protect leaders and the rod, but you gain so much more in the hook set and mend. Another reason I love the low stretch is when you snag up, you break your leader rather than your mainline. Mono has so much stretch that when you fight fish and are pulling on snags your line gets thinner and thinner. Next thing you know your .0130” (15#) is now .010” and 8#. Add the abrasion factor from your guides and weak spots from your shot. Now your snapping rigs off constantly.

Unlike steelhead, trout are more selective when it comes to flies. Often times making a change to a different pattern will result in a big reward! Adam McInerney with a trophy brown trout from a New York tailrace.
We change our leaders throughout the day but never stop to re-rig our float to swivel section. So you have a fresh piece of 6# leader vs. mono that has been stretched out all day and is going to break! I have not experienced this with Chromium. The many anglers I have talked to share the same great feedback! The problem, if you want to call it that, is if it’s windy and you’re using a lighter float sometimes it’s hard to keep the line on top of the water. Meaning the wind catches the line easy. I don’t even know if that is an issue, but it was something I noticed. The price is also double that of the higher end floating mono on the market. It’s available in 10, 12, 14, 16, 20, and 24. It’s only available in Camo Smoke which is considered low visibility. When you buy Chromium the pound rating is the actual breaking strength with a knot. You will notice 2 pound strengths on the label. The knot strength and the breaking strength were tested on a line breaking ma-chine. We loose 10-20% when we tie knots so it’s nice to know what the line actually breaks at. For example the 12# Chromium is tested at 14.9#.
Monofilament
Growing up fishing a centerpin, it was re-ally hard to find a mono that was durable, slick and floats. Typically, the slicker it was the more it sank. There were very few lines made for float fishing with the exception of Siglon F which I never liked. It was partially my fault because I didn’t check diameters of the line. I didn’t realize that the 8# I had always fished was a much thicker diameter than the Siglon F. I’ve learned there is no line police monitoring breaking strength. Most big brands will build a couple extra pounds in the rating by making it thicker which makes the customer think it’s a stronger line. You should always compare apples to apples when buying line. I have seen people hate a brand only because they didn’t know that they were fishing half the diameter of the usual brand. Fast forward to five years ago we had a few better selections. Blood Run has continued to be the leader in floating mono. They offer 10#, 12#, 15#, 23# and 28#. They have a whole selection of great colors to choose from like Smoke Purple, Ocean Blue, Olive, Clear, Flame Orange, Chartreuse, and High Vis Pink. For under $15 bucks you get an awesome product. After you rig on this line slide your float and shot up and down it until the shot and float move easily but stay in place. Now cut off that section of line you “broke in” the shot and tie your swivel on. This is my floating mono of choice.
Braided Line
Braids are much more popular out on the West Coast than East Coast for bobber fishing. Braid is tough, some of it floats really well, and it virtually has no stretch. P-Line has a braid specifically made for float fishing called Hydrofloat. Fireline also has good floating properties. I prefer a fluorocarbon leader over mono. I will get into that later. Fluorocarbon has virtually no stretch like the braid. I notice when you don’t have any sort of bumper in there you pull and bend lots of hooks. Having a mono bumper in there will really help but why bother when there are other choices.

Leader
Everything in a float fishing rig is about balance. When buying leader material I am looking for something invisible, low light reflective, soft but not too soft, good knot strength and super durable. You can’t have it all because the stiffer fluoro is, the stronger it will be, but the lower natural movement you will have. This works both ways. With all of the fluorocarbon on the market how do you decide? Sometimes the fish don’t care how natural your bait looks. I ac-tually carry really durable fluoro with very low flex when the fish have the feed bag on! This way I can catch many fish without changing. For my everyday use I like Blood Run Fluoro in sizes 3-6# for trout and sizes 5-12# for steelhead. Blood Run really did an awesome job with their leader. Another great option is Invisa-Chrome which is from the same line up as Chromium. Soft, supple, strong and excellent knot strength. Both are great choices for fluorocarbon “leader lines.” You can also find some real gems out there in the 200 yardish size. My favorite big spool fluoro is FC Sniper. They make just about every poundage and for a cheaper fluoro it’s awesome! I often find running the same brands of fluoro leader as my mainline is helpful because they follow the same diameters most of the time. So, if your running 15# Blood Run you know you can run 8# size of their leader without problems.
It’s worth mentioning mono leaders as well. I don’t personally use them but some very good fisherman I know from Michigan and Washington swear by Maxima Ultra Green. With mono you get excellent natural bait movement, great knot strength and it doesn’t shine light through it like fluoro. One final mention is a new material called Paranix with is supple, more durable than fluoro by double, and is clearer than fluoro. It’s a newer product but I have enjoyed the little bit I have used it.
The Floats
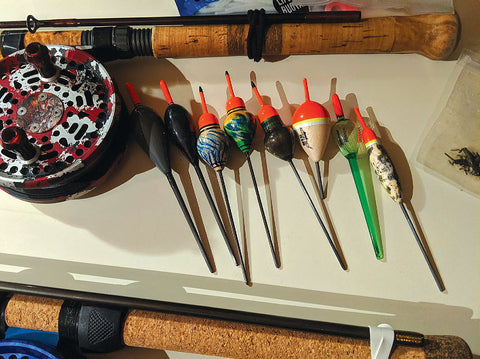
A nice selection of floats in sizes 2 to 8 gram are important to have. You never know where your journeys will take you. Try to find floats that push easy in light current and are stealthy.
When using a centerpin in larger rivers “your eyes are the limit.” So, get a float that is a good combination of stealthy, but one you can see during your drift. There are countless styles for every situation. Like my fly and jig choices I am trying to find something that will cover most of the spectrum. By far my favorite float style for small to medium size rivers (up to 400 CFS) are Swan Style. This is a shorter float with a longer stem. The entire float stays submerged under water, leaving just the top post visible. I like this float because it takes very little current to push this float and it will naturally drift slower in fast water. It’s sensitive and easy to trot or dead drift. The “tear drop” shape of the swan has very low surface tension when weighted properly. It also disrupts minimal surface water and casts beautifully when tubing is correctly pinning the line at the tip of the top stem. The Blood Run Swan is an awesome choice or third shallow acorn style float. I also like using the Drennan Crystal Swan “Bobber” for clear water, but you need different tubing for these. Your best bet is to hire one of the incredible craftsman from Hero Drifter, Superior Floats or Black Tip floats to make you the perfect style. They cost a bit more but they will be perfect. I have worked with each manufacturer so they will know what you’re looking for. You don’t lose many floats if you’re rigged properly so spending a little more makes it special and your fish-ing experience even better.
The Shot
I would suggest getting a nice variety of smaller soft split shot. You’re looking for a non-eared, round or egg shaped shot. You want it to have the largest cut as possible making it easy to pinch them on your line. I prefer sizes AAA (.8 gram), AB (.6 gram), BB (.4 gram), BB#1 (.3), BB #4 (.2 gram) and BB#6 (.1 gram). Blood Run Tackle makes a great split shot! Make sure it’s lead if you can use lead. There is no better material to achieve this presentation. The various sizes allow you to spread your split shot down your line to give your bait the ability to lead in front of the rest of the tackle on your line. This way the fish see your bait first.
Swivels
The smaller the better! However some anglers have a problem with the really tiny swivels. Typically you want something that is sizes 10-28. Yup 28. It’s smaller than an ant. When you are buying your swivels make sure they have a poundage rating on them. I typically always want to have a higher breaking strength than my mainline. You want something that has good rotation as well. You can’t go wrong with a few certain brands. It just depends what you’re looking for. Blood Run makes incredible swivels and they also have an outstanding value associated with it. I like their size 12 swivels which break at 45# and are black chrome colored. You can get a couple seasons worth (50) for around $12! Owner has a size 14 black colored swivel that breaks at 30#! Unfortunately you only get 10 for $5. The smaller you go the more expensive they get. Hitena makes some really tiny swivels down to a size #28 that breaks at 20#. They are a dull silver. You only get 6 of those for $4. Hitena is cool because they put the weight of the swivel on their packaging and when you’re trying to make that perfect accelerated shot pattern you can match the swivel weight to your shot. I often will run 2 swivels if I am going to tie a dropper off one of them or if I want to run really tiny shot near my bait.
One thing I can promise, if you give this technique an honest effort, it will put more fish in your net. The art of center-pin fishing combined with long distance nymphing, jigging, or bait fishing is fun and effective. We are only in its infancy and I am excited to see what fun twists anglers put on this style moving forward! I look forward to seeing you all on a river. If you see a guy with a funny looking fly reel make sure you go over and give it a peek. It may change your entire fishing hobby into an obsession if it isn’t already.
For more information visit: colvilleoutfitters.com
2 comments
What are your thoughts of using same set up without a float ?
What a great article! Leaving me to be very excited to learn much more about this type and style of fishing and get setup to learn it. Thanks